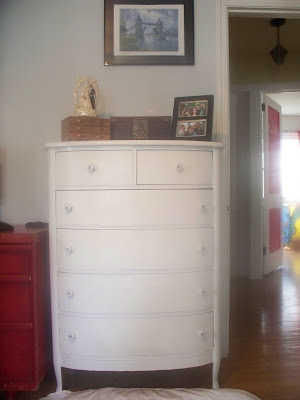
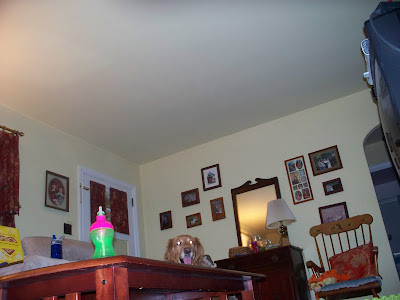
Redecorating for Free

Mantle before

Long have I wanted to take down that oversized mirror. The main thing that gets reflected in the mirror is the ceiling. It looks ridiculous. Yet, I’m pretty sure I will have to paint the wall once it comes down and I’m just not ready to tackle another paint job.
Instead, I took one of my favorite paintings down in the dining room since it won’t go well with my new striped color scheme and leaned it up against the mirror.

Mantle after

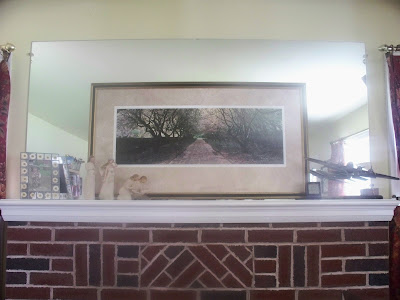
I love the painting over the mantle! It blocks the majority of the ceiling view. It’s big enough to demand attention and not get swallowed up by the fireplace. The light brown border even complements the brick work. Why I might never take it down.
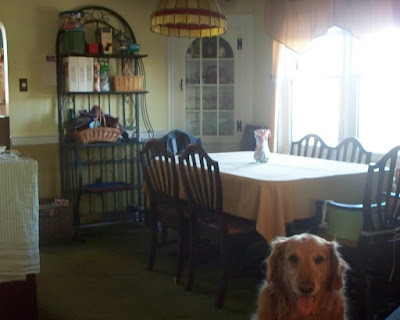
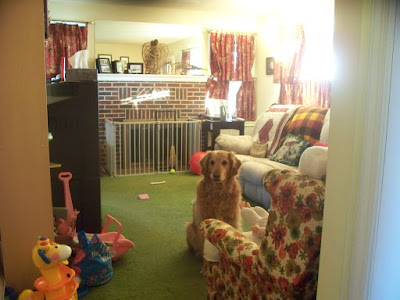
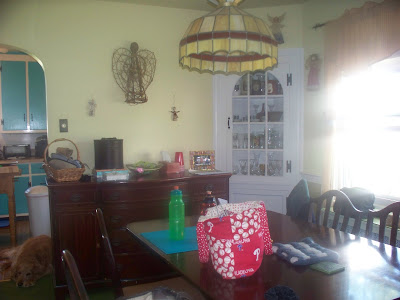
Dining room before

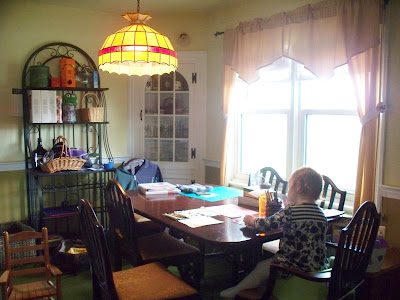
After moving the large painting to the mantle, the dining room walls looked stark. So, I went shopping in the guest bedroom and living room for more artwork.
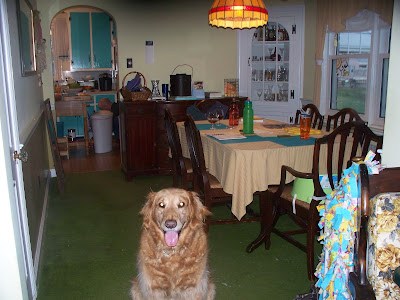
Dining room after

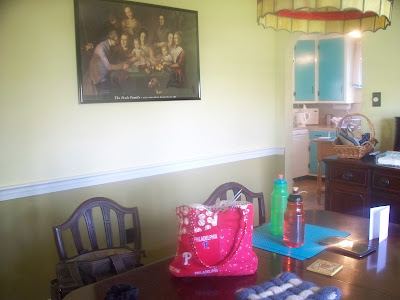
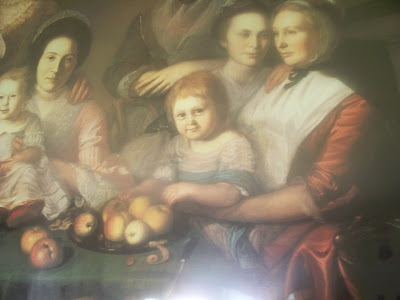
The Peale Family used to hang in the guest bedroom. I’m not sure why I never tried hanging it in the dining room before. It fits better here. The Peale Family is gathered around their dining table. It only seems right to hang it next to our dining table. Did you notice that the Peales have a red-headed daughter too?

To fill the remaining walls in the dining room, I gathered up my entire angel collection and hung them in small groups.

The wall over the hutch could stand to have a few more angels, which is just a lovely excuse to go visit my favorite thrift store in town.

5 Years to Paint 1 Dresser

Maybe it was 6 years. I don’t recall when I started this project. All I know is that I became dreadfully bored with painting the dresser white and found a million projects to keep me busy instead. So, the dresser looked like this for at least 5 years.

It might have stayed like this forever if Dan hadn’t teased me about it.

Even after pulling all the drawers out and moving the dresser downstairs, I had to give myself more than one pep talk to knock the priming and painting out.

I just don’t like painting things white. Give me turquoise or red and I’ll jump for joy, but white bores me. After a while, it even depresses me. It’s no fun at all.

And to think I have several doors and radiator covers that need to be painted white. I hope it will take me considerably less time to finish them all.

Do you have any home DIY projects that you are dragging your feet over? Do share!

Too Many Projects

When I told Dan about my desire to paint the kitchen walls orange, he laughed at me and told me I had too many projects. Maybe he is right. Here is my current to-do list.

1. Sew a party dress for Elly and me – deadline Sept 22nd

2. Plant tomatoes, zucchini and more carrots in my vegetable garden – deadline Mother’s Day

3. Paint stripes in the dining room – deadline asap because the carpet is falling apart which is no surprise since it is probably 50 years old

4. Paint the door white in the dining room – asap – see above

5. Paint the rad cover white in the dining room – not essential as the radiator can just sit bare

6. Finish knitting the hexagon blanket before the weather gets warm – approx May 15th deadline

7. Sew sheer curtains for the dining room and living room – deadline Thanksgiving Day

8. Sew slip covers for the wing back chairs – deadline Thanksgiving Day

What’s on your to-do list?

A Bigger Dining Room

In the before shot, you can see the bakers rack.

It was a gift from my father-in-law. It worked great in our old apartment, providing much needed storage in the kitchen.

It has never worked quite so well in our home. For starters, it doesn’t fit in the kitchen. So, I stuck it in the dining room. The dining room is a small room and it is made smaller by the bakers rack.

Though the shelves are full, they are full of stuff that we rarely use. Not being avid wine drinkers and being the proud parents of a very curious daughter, the wine rack is empty and will remain that way.

Yet the driving force behind my desire to relocate the bakers rack to the basement was my upcoming striped paint job. If I’m going to go through all the trouble of measuring out and painting stripes, I want people to see them.

Once I moved the bakers rack, I noticed that the wall adjacent to the kitchen doorway was long enough to house the hutch. So, I moved it. Well, now look at the room.

There is so much space!

The dining table can actually sit underneath the ugly retro chandelier. I can walk around the entire table!

And look, I have the entire long wall to paint stripes on. Oh, I’m a lucky girl!

Stripes in the Dining Room

Dan vetoed beadboard wainscoting.

Source: CTMLS, Inc


Searching for ideas on how to decorate the dining room, I fell in love with this striped idea.

Source: The Family Handyman


Can you picture stripes of yellow, olive green and orange in our dining room?

With Elly’s help, I was able to try out the idea in crayons.

The green fabric is what I’m using to slip cover the two wing back chairs in the adjacent living room. The fun and vibrant fabric will be curtains for both the dining room and the adjacent living room. Isn’t it great? I have become a fan of bright and cheerful colors. I can’t help myself.

Oddly enough, Dan is not opposed to my new plan. He thinks I’m nuts, because painting stripes is a whole lot harder than just painting it all one color. He is also slightly concerned about me adding green back to the walls when it had taken us so long to get rid of all the green in each room. The original homeowner must have loved green. It was everywhere. It’s still the dominant color in the basement.

I refuse to worry about a few green stripes taking over our house. Besides, I’m just giddy to begin painting another room. This house is starting to feel like our home and not the old home of the Elliott household.

Chalkboard Fun

Elly loves chalk. True, it’s partly because she has acquired a taste for it, but it’s also because it can be erased easily, providing endless hours of drawing or at least a solid 10 minutes.

So when Elly drew on the newly painted attic door with permanent marker, I decided to repaint it using chalkboard paint.

Now when she gets tired of helping me cook, she can draw.

Because I needed a place to jot menu ideas as well as items to be added to the grocery list, I made a miniature chalkboard for me too.

Total cost for both – $12.25
Chalkboard paint from Walmart – $10
Frame from Memories n More, local consignment store – $2
Yellow paint – from stash
Acrylic coat over yellow paint – also from stash (and to think I was going to throw out all my paint because I hadn’t used it in over a year)
Chalk from Walmart – 25 cents

2 chalkboards just means more happiness in my turquoise kitchen!

Happy Dance in my Kitchen

Finally, the last of the kitchen cabinets are painted!

I’m so happy! It looks better than I imagined it would.

Before I just loved the layout of my kitchen and the awesome stove, but now I love the feel of the whole room. It’s so bright and cheerful! Somebody pinch me.

Before with the 1970’s avocado green

Now with the turquoise 

Oh sure, I still have a laundry list of things that need to be upgraded, like the floor, the faux vent, the backsplash, and the island. And I would cut my left arm off just to get some more lighting. But all those things cost considerably more than a can of paint, so they’ll have to wait.


This post joined TDC’s link party!

TDC Before and After

Updating Elly’s Toy Chest

I bought this toy chest last year at Memories ‘n More, a local consignment store.

It was my hope that all her toys would fit in it. Ha! Oh the silly dreams we first-time-mothers have.

While searching for curtain fabric, I ran across some red elephant fabric and couldn’t resist buying a yard for Elly’s room. After a brief lesson from Dan on how to use the staple gun, I was off.

Now not only does the toy chest match her red-themed room, but it also matches her nickname (Elly, short for Elizabeth and elephants).

Thanks to Elly’s help yesterday, I have to fit all the toys back into the toy chest. Maybe I’ll take the opportunity to rotate her toys.

Scored 2 Chairs

On my way back from taking Jake for a walk and letting Elly play at the local school playground, I saw these chairs sitting in front of my neighbor’s house.

I loved them immediately.

The big, dark wood goes with all the rest of the old, inherited furniture we own. Though the cushions need to be replaced, I still have half a roll of cushion foam leftover from my ongoing wing back chair project.

Do you remember my crazy musical chair plan for the wood stove? Well, we won’t be getting the wood stove because it wouldn’t easily connect to our fireplace. However, my plan involved having 2 chairs flanking the fireplace. I even wished for another wing back chair to slip cover.

I got pretty close to having my wish granted. Neither are wing back chairs, but they are comfy sitting chairs. Not being wing backs will allow me to sew slip covers in a weekend or two rather than months.

This chair is actually a rocker.

I love rocking chairs. I haven’t a clue where I will put it. There really isn’t room for it, but that didn’t stop me from dragging it home. Literally. Dan was off watching a movie with a friend. Not willing to leave it on the curb lest someone else snatch it and not able to lift it, I drug it across my neighbor’s yard and into my yard. Sheer determination got it onto our front porch.

A Small Change

We moved into our house almost 6 years ago. All the windows came with curtains. I have born a deep hatred for them all. They are too formal, too flowerly, and too dark. Yet, I have kept them, biding my time until I find the perfect fabric to replace them with.

But, why did I keep the mini curtain over the front door? It served no real purpose. It looked ugly. I suppose I kept it because it matched the rest of the curtains in the living room.

As usual, I forgot to snap a before picture. Thankfully, Elly caught the front door in the very first picture she took on my camera.

Yesterday, after finally ordering half of the fabric to replace the red living room curtains, I climbed onto a chair and removed the curtain hardware.

It looks so much better.

All I did was remove 4 screws. If only all DIY projects were this easy ……