Duvet Cover for Christmas

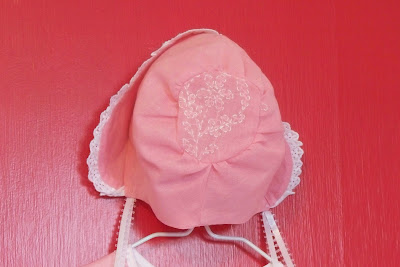
It doesn’t look anything like a dress, does it?

I can explain.

My favorite place to shop for cotton fabric, Quilt Generations, was closed the evening I went searching for dress fabric. Due to the late hour, I ended up at Walmart. Not surprisingly, I didn’t find what I was looking for. However, Walmart did have an excellent selection of fleece, so I bought enough to make a duvet cover for Elly’s down comforter. Upon returning home, I realized the fleece fabric wasn’t going to fit in my china cabinet. (Where do you keep your fabric?) Thus, I opted to make the duvet cover first.

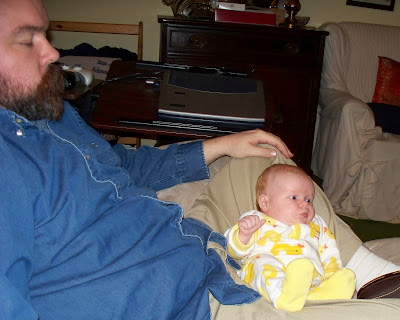
But perhaps I should backup for you might be wondering why a baby needs a down comforter in the first place. It’s an easy answer: because Dan and I each have one. Naturally, our daughter needs one as well to keep her warm during the cold winter nights.

Pattern: You don’t need one. A duvet cover is nothing more than 2 pieces of fabric stitched together with buttons at the bottom to keep the comforter from falling out.
Fabric: 1 yard of fleece for the front and 1 for the back or 2 yards total.
Time frame: 10 days though if I didn’t have Elly it would have been completed in just a few hours. Of course, there would be no reason to make a duvet out of such fun fabric if I didn’t have Elly.

Christmas Present #1 is finished
Woo!

And the backside of Elly’s duvet cover matches her new shirt. Perfect.

Impromptu Tag Blanket

Pattern: You don’t need one. Besides Taggies has a patent and a copyright on the design so you’ll never find a pattern legally. However, a tag blanket is nothing more than two pieces of fabric sewn together with bits of ribbon sticking out.
Fabric: The green you recognize as being leftover from the quilt. The pink came from a basket cover that I received at my baby shower.

Thankfully, I have yet to offend anybody by my habit of repurposing fabric received as a gift.
Timeframe: approx 2 hours

Most importantly, does Elly like it?

Elly is absolutely my daughter; she loves to run her hands over fabric.

First Impression of my Babylock

I picked up my new sewing machine from Pottstown Sewing & Crafts over two weeks ago. It’s a Babylock Decorator’s Choice.

Due to Elly demanding most of my time, Saturday was the first time I got to spend some quality time with it. My initial attempts to thread the machine and to sew a simple quilt did not leave me with buyer’s remorse. I felt just the opposite. It made appliqueing the ‘F’ blocks and piecing the blocks together so easy.

I might actually quilt more!

This new machine can sew circles around my old girl. With 174 stitches, it is a source of inspiration. Some of the standard features, such as foot-free sewing, stopping with the needle down, auto threader, easy bobbin assembly and more, made me wonder why I waited so long. Sewing is such a joy on this Babylock.

Already I have a list a mile long of projects I want to tackle on it. Not one has me filled with dread and worry over how my machine will handle it. I am confident in my sewing machine once again, a feeling I haven’t known in many years. Too often in the past, I had opted to perform a sewing technique by hand rather than fight with the sewing machine. Now the sky is the limit to what I can do.

Because a post cannot be complete without a picture of little Elly, here you go.

Because I Didn’t Own a Sledgehammer

It was 1 of 2 reasons why my sewing machine hasn’t been smashed to smithereens. The other reason is due to the fact that my favorite sewing store in town, Pottstown Sewing & Crafts, holds a “Trade-Up” sale every few months. Why they are willing to give me a credit for this machine is beyond me.

It was a great machine 10 years ago when I bought it, perfect for a beginner sewer. It handled the occasional hemming and mending like a pro. Somewhere over the years, I fell in love with the craft of sewing. It just hasn’t been able to keep pace with me due to it’s minimal library of stitches and available feet. On top of that it doesn’t function properly. Just threading it requires that all the dials be set to 0 lest the needle jams in the bobbin casing. It also has a tendency to lose tension halfway through a project which in turn causes the needle to jam in the bobbin casing. Guess how good I am at taking the bobbin casing apart and putting it back together again.The tension problem is the main reason I hate the machine so.

Even Elly doesn’t like it.

These past few years I have been pining for a new machine but I kept trying to make do with what I had – silly resourceful trait of mine. When my machine lost the tension during the quilt I made for Elly, I decided enough was enough. I deserved a better machine.

True, I still have the back-up machine that I found on the side of the road with a “Free. Works.” sign on it.

Unfortunately, the old girl can only work a straight stitch. All other functions have been lost and would require the skill of a professional to correct. Despite the problems, I plan to keep her as a back-up. Just this month, I was able to sew up a pair of pajama pants on her.

Last Monday, I visited my sewing store to test run a few Babylock models that I was interested in. It didn’t take me long to decide on the Decorator’s Choice. It had everything I needed, everything I wanted and even some features I’m not sure what to do with. In other words, it’s a machine that I can grow into rather than one that I would grow out of in a year or two. I pick it up tomorrow. I can hardly wait.

What does Elly do whilst I sew?
She supervises from her bouncy chair.

Pure Survival

We made it! Elly is now 7 weeks old. Amazingly, not only is she still alive but Dan and I are still thrilled to be her parents despite the sleepless nights, spit-drenched clothes and bruises from her cute habit of head butting.
Some of us are more exhausted than others from the experience.

It wasn’t all for naught. We’ve learned a few things about Elly along the way: she grunts to communicate, she dislikes having to go to bed (thankfully, she isn’t old enough to whine and to beg to stay up just 10 more minutes), and she loves watching wrestling with her Dad.

Just this week, it has felt like a fog has lifted. Elly isn’t eating any less or requiring any less attention. And no, Elly isn’t sleeping longer than 2-3 hours at a stretch in the night. Hopefully, longer stretches of sleep will come soon.
Rather I am finally learning how to adjust to life with a newborn. True, very little gets accomplished outside of nursing, changing diapers and holding her. Still I have found little windows to accomplish the hobbies that I hold dear.One of the first things I found time for was my daily walk with Jake. After a few failed attempts at different times in the day, I learned that it was best to squeeze it in after Elly’s noontime snack. The timing works perfectly because Elly can take her afternoon nap snug and secure in her Ergo baby carrier.

While waiting for Elly to drift off to sleep after a big meal, I find time to knit a row or two. Elly only objects when the yarn drapes across her face.
At night when Dan is home, I sneak off to the kitchen or the sewing room while he enjoys quality time with his daughter. Though this project was supposed to be Dan’s birthday present (his birthday is the 28th), it is looking more like a Christmas present.

Another joy of having a newborn: things take longer to accomplish.
I wouldn’t change it for the world though. Elly is wonderful.

Still Waiting

Elizabeth’s due date came and went on Monday. Here it is Wednesday and Miss E still doesn’t want to come out and play yet.

The finishing of her quilt on Monday did nothing to entice her. It seems that she is quite cozy where she is, thank you very much.

The front:

The back:

Stats:
Design: My own, if you can call it a design. Truly it’s nothing more than a huge 9-patch square enclosed by 2 borders.
Quilting: I used a combination of stitch-in-the-ditch, following lines in the themed fabric, and using cookie cutters to draw designs in the plain fabric squares.
Fabric: The princess squares and the back fabric are from a line called “Once Upon a Time”. I found it in my local quilting store (how spoiled I am to have both a quilting store and a sewing store within walking distance). Additionally the red heart fabric was also found in my local quilting store. The blue fabric was “donated” by Dan; it’s an old work shirt of his that no longer fit. The white fabric was from an old sheet. I just love to incorporate at least one “old” fabric in each of my quilts.
Duration: 1 week from start to finish; I think it’s the fastest I’ve ever completed a quilt. I should bottle this nesting instinct and sell it. I could make a fortune!

More Pretties for Elly

Pressured by the fact that my sewing machines will have to packed away for a month and extremely motivated by the nesting instinct, I have been sewing up a storm for Elly.

I recently completed bloomers for Elly


Stats
Pattern:
Tessa Bloomers
Designer: Marie-Madeline Studio
Size: 2T – it was the smallest size the pattern came in
Alterations: None that you can see. Since I’m a stickler about seams especially when it comes to children’s clothes, I ignored the pattern’s suggestion to use a serger (mainly because I don’t own a serger) or a zigzag stitch. Instead I used a mock French seam in most areas and double bias tape where the bloomers are gathered.  
Review: Great pattern and cute design!

along with a kimono robe and bonnet to match the pink dress made earlier


Stats:
Pattern: Simplicity 2900, a vintage pattern from 1952
Size: Small, 6 months
Alterations: Mainly I ignored their suggestion on where and how to place the embroidery. The fabric I used was already embroidered so all I had to do was cut the pattern pieces out carefully. Additionally, the lace on the kimono robe hides the fact that I had to piece together the front of the robe in order to get the embroidery on the bottom.


Review: As thrilled as I am with how the dress, kimono robe and bonnet look together, this pattern required too much hand sewing to get an A+ from me.
Note: I have already informed Dan that we will have to take Elly someplace special so she can wear her pretty dress and accessories even if all we do is drive over to her Granny’s house.

and finally a pillow to preserve the cross stitch my MIL made for Dan many years ago.


Stats:
None. This was simply a matter of adding sashing around the cross stitch and a plain piece of fabric to the back.

Next up, I’m thinking of starting a daybed cover for the guest bedroom unless I change my mind and sew something else for Elly. It does seem slightly silly to make a daybed cover when the daybed is going to be used almost daily for a month after Elly is born. Which is to say that the cover is going to spend most of its time folded away in the linen closet whilst the bed is in use.

So, should I sew a Mei Tai sling (noting that I already own the Ergo sling), a robe for Elly, a play outfit for Elly, or curtains for the guest bedroom?

Or should I just pack away my last remaining sewing machine and focus on my knitting projects? I have yet to complete Elly’s baseball blanket or her heirloom shawl.

Decisions. Decisions.

This is a post from Knitted Gem’s blog, authored by Marie Haigh.

Sewing Tutorial – Nursing Cover

As promised, I put together a short tutorial on how to make your very own nursing cover, a.k.a. hooter hider.

It’s a fast and easy project that should take no more than 1 afternoon to complete. Make one for yourself or make one for a baby shower gift. Heck, make two.

Materials required:
1 yard of main fabric in 100% cotton
1 yard of coordinating lining fabric in 100% cotton
2 two-inch-wide D-rings
thread to match fabric

Cutting specifications:
Cut 1 rectangle each from main fabric and lining fabric for the body:
33″ wide by 31″ long

Cut 2 strips from the lining fabric for the 1st strap:
3″ wide by 30″ long

Cut 2 strips from the lining fabric for the 2nd strap:
3″ wide by 13″ long

Seam allowance:
Unless otherwise noted, the seam allowance is 1/2″.

Instructions:
First, with right sides together sew around the edges of the 1st strap, leaving one short end open. Trim corners. Turn right side out. Press. Top stitch 1/4″ from edge around sewn edges.

Next, with right sides together sew the along the long edges of the 2nd strap, leaving both short ends open. Turn right side out. Press. Top stitch 1/4″ along sewn edges. Then, slide on the D-rings. Fold strap in half with the D-rings at one end and raw edges at the other. Stitch 3/4″ underneath the D-rings securing them in place.

Pin right sides of the body together. Then, insert straps into the top of the body 9.5″ from sides. Match up the raw edges of the straps with the raw edges of the body. Make sure the finished edges of the straps are tucked safely into the center of the body, away from where the stitching will occur.

Stitch body together, leaving a 5-inch opening at the bottom to turn right side out. Back-stitch over straps. Trim corners.

Turn body right side out. Press. Top stitch 1/4″ all around the body.

This is a post from Knitted Gem’s blog, authored by Marie Haigh.

Sewing Frantically because Elly will be Here Soon

The curtains are finished!

Baseball buttons adorn both panels now allowing me to fold up the bottom half to make room for the radiator.

While waiting for the buttons to arrive, I whipped up a nursing cover, a.k.a. hooter hider.

Since it was such a joy to sew, I’ll be posting a short tutorial on the cover in a few days.

Currently, I am sewing up Elly and her little friend in Seattle matching bloomers. If I finish them as quickly as I would like to, I plan to sew one more item for Elly: a bathrobe. Then, there is also the Mei Tai sling I’d love to find time to sew.

But the clock is a-ticking. Elizabeth is considered full-term now at 37 weeks.

With a little luck, she will enjoy hanging out in her current abode for a few more weeks, giving her Mom time to finish all the current sewing and knitting projects and time to reorganize the guest bedroom/sewing room. It pains me already to think that I will have to pack away my sewing machines for over a month to accomodate our overnight guests. Yet, the help I will receive in return should more than make up for it. Besides, will I really have time to sew when Elly is a newborn? I suppose not. And, of course, I’ll still have my knitting.

This is a post from Knitted Gem’s blog, authored by Marie Haigh.

Utensil Case Tutorial for an Easy Gift

My first sewing tutorial was supposed to be Radiator-Friendly curtains, but I got side-tracked. Christmas is right around the corner and I needed to finish the handmade presents I had planned to make months ago. Why I always wait until 2 weeks before the deadline is beyond me.

Just in case you’re scrambling for a quick and easy handmade gift too, I decided to share my instructions on how to make the utensil case shown below. I made this case in one afternoon. Its design is based off of my favorite dp knitting needle case.

Cut 1 rectangle each from main fabric and lining fabric:
Rectangle dimensions: 11 1/4 inches wide by 14 1/4 inches long

Cut 1 rectangle from lining:
Rectangle dimensions: 11 1/4 inches wide by 5 1/8 inches long

On shorter piece of lining, fold top down 1/2 inch. Press. Then fold raw edge into crease. Press. Topstitch close to fold.

With the wrong side of the short piece of lining facing the right side of the longer piece of lining, match up the raw edges on the bottom edge and sides. Stay-stitch using a 3/8 inch seam allowance.

Next, stitch 5 separation seams 1 5/8 inches apart only where the two linings are stacked on top of each other. The first and last separation seam will be 1 5/8 inches plus 5/8 inch away from the edges or 2 1/4 inches from the edges to accomodate for the seam allowance. Hint: mark first with fabric pencil, then stitch.

Cut two (2) 16-inch lengths from a coordinating ribbon. Line up raw edges of ribbon with raw edges of lining, centering it over the top edge of the utensil slots. Stay-stitch the ribbon in place using a 3/8 inch seam allowance.

With right sides together, stitch main fabric to lining using a 5/8 inch seam allowance. Be sure to leave a gap at the top to turn and to tuck the ribbon inside. Trim corners. Turn right side out. Press. Slip stitch opening closed.

Fold raw edges of ribbon twice over and hand tack down with a running stitch.

Insert utensils. Note: If you didn’t have the forethought to purchase the bamboo utensils in advance (they can be found on Amazon), you can always raid your kitchen drawer for a set of utensils.

Fold in half and tie with ribbon.

Of course if you’re really pressed for time (and you still have a week before Christmas or whichever holiday/event you’re celebrating), you can buy the utensils and handmade case from Ponyup on Etsy. Note that her case design is a bit different from mine.

This is a post from Knitted Gem’s blog, authored by Marie Haigh.