Orange Furniture

Go on. Admit it. You’re jealous.

Well, maybe orange isn’t for everybody, but it’s definitely for me. I smile every time I walk through the dining room and see it sitting in the corner.

This was one of the colors I was going to use to paint stripes on my dining room wall, but we all remember how that ended. So, this table is my consolation.

It houses all of Elly’s crafts that are allowed upstairs. (The messier crafts like play-doh, paint and glitter are kept in the basement.) Oddly enough, pouring a quarter of a bottle of glue on a paper plate to make a tissue flower is not considered messy in my book.


Elly’s craft table is so bright and cheery now.

When Elly saw it finished, she gasped “It’s beautiful, mama.”

That’s my girl.

Organizing Toys and Kids’ Crafts

The key to organizing toys or frankly anything that is starting to take over your house is to purge.

The rocking chair in Elly’s room that hasn’t been used in at least 2 years – moved to the basement.

The stuffed animals that Elly never plays with – stored in jumbo plastic bags and moved to the attic.

The baby toys Elly has outgrown – also moved to the attic.

The store bought blankets that were no longer needed because Elly has been gifted so many beautiful handmade blankets – donated.

Then, armed with a hodgepodge of old tins, mesh bags, baskets, buckets and plastic organizing bins, I start sorting. End result looks something like this.


I know many people like their containers to match, but I prefer the hodgepodge. First, it’s cheaper because you get to use what you already have. Second, it doesn’t require a labeling machine. Each toy gets its own unique home.

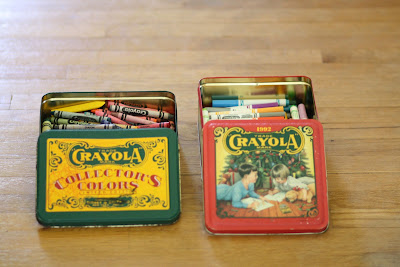
Tins are perhaps my favorite container to store toys and craft supplies in. I decided a long time ago that my life is too short to spend several minutes everyday to painstakingly inserting crayons or any toy or craft for that matter back into the cardboard boxes they are sold in. It is so much easier to just grab a handful of like items and dump. Pop a lid on and you’re done. It’s my kind of cleaning up.

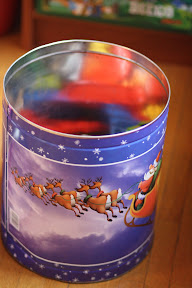
The huge popcorn tins are perfect for storing legos. I’m sure I could organize all of Elly’s toys if I had a collection of these popcorn tins, but alas I don’t. Perhaps it is for the best, since Elly recently learned that rapping the tin with drum sticks makes a magnificently loud sound.

Baskets are great for corralling block collections. The size of the basket had to be upgraded after Elly got a set of foam blocks for her birthday, but the system still works. Baskets are also great for storing stuff that is too big to go anywhere else.

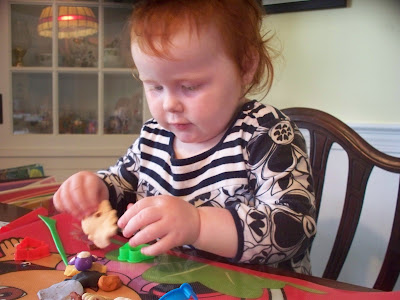
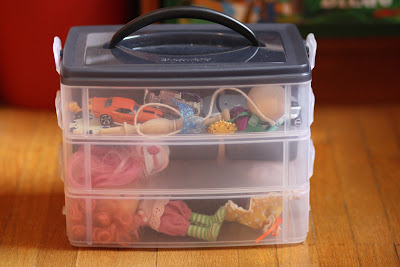
When Elly received a toy with itty bitty parts for Christmas, I balked and seriously thought about hiding them from her until I found this stackable container. Elly likes playing with the container almost as much as she likes playing with the toys inside.

Storing a variety of puzzle pieces in a large bucket is not for the OCD person, but I prefer it to the traditional method of returning the puzzle pieces to their original box. With this method, Elly can put the puzzles away. My trick to being able to distinguish the pieces apart is to draw a crude picture on the back.

Although Alex and Doug magnetic dolls are packaged in a wooden tray, I do not keep them stored that way because the wooden tray lacks a lid. Instead the dolls and all their clothes live in a plastic bin. These bins were designed to hold scrapbooking supplies, but they are awesome for kid’s toys. Check out the handle! Elly can tote her dolls from room to room. Plus they are transparent which is a necessity when your kid is too young to read labels.

Mind you this organizational system probably won’t last long. It seems that every few months Elly grows up on me, changes her mind about her favorite toys and then her room is in need of an overhaul.

It is true that at clean up time there is first a sorting process so toys can go back in their rightful container, but that little bit of extra effort means that Elly can always find the toy she is looking for. Plus I don’t seem to mind the massive amount of toys that Elly has accumulated so long as they stay corralled in pretty containers. It’s a win win. Elly keeps her toys. I get peace and harmony.

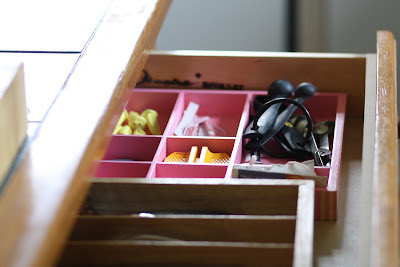
On a side note, the wooden tray from the magnetic dolls now sits in the drawer in my kitchen island and organizes all my small cooking utensils.

Crazy for Christmas

Last year, I bought my first Christmas gift in January. Not only have I done the same this year, but I have also started making stuff for Christmas.

Any guesses?

It’s an advent calendar that Elly can use. Made out of a metal Santa tray, bottle caps, magnets, stickers and a whole lot of E6000 glue, it’s virtually indestructible. Though I won’t hold my breath. Elly has been known to prove me wrong. In her defense though, we have ruined more toys than she has. Who knew that Barbie dolls broke if you stepped on them?

Our old felt Santa advent calendar had his candy cane removed, sucked on, and thrown on the ground. Any attempt to replace the candy cane with another object so that it could be moved from pocket to pocket was thwarted by Elly.

It is my hope that this year we can count down the days to Christmas together.

Another Wreath

Because one wasn’t enough.

All the jingle bells that had been hot glued to this wreath  were removed. 
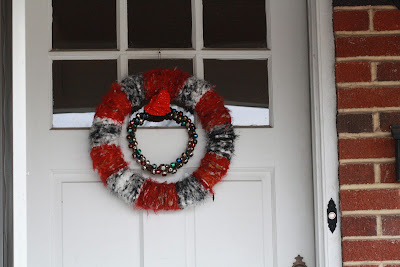
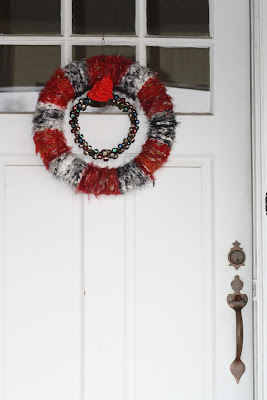
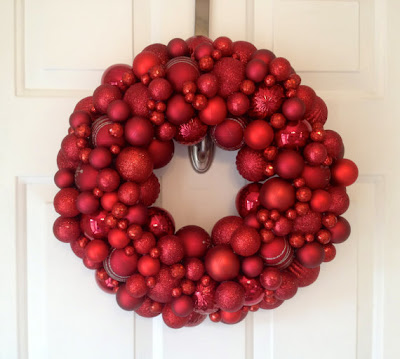
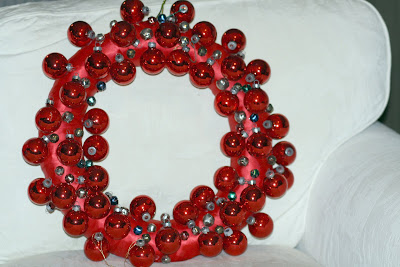
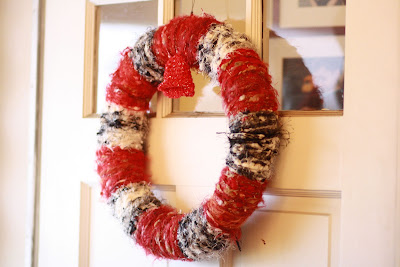
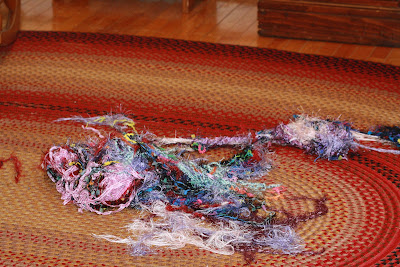
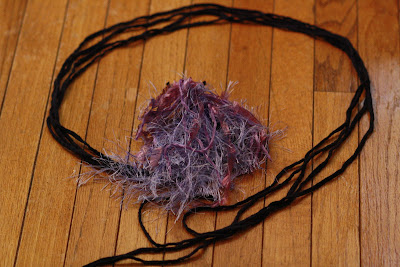
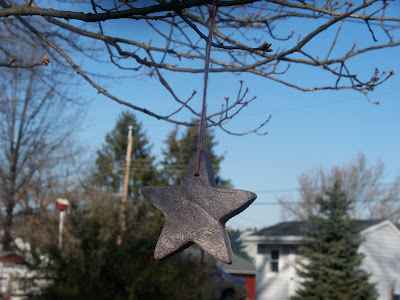
Frankly, everything was removed. There was no way I was keeping that hot mess. Maybe I’ll try again soon to make an ornament wreath. After I make some Christmas cookies that is, but I digress. I was telling you about the new wreath.

A coat hanger looked like the perfect wire to hang the jingle bells on, but I was having trouble making it into a circle. I asked Dan for help and he mocked my choice of wires. Husbands are great, aren’t they? Then, he cut me a length of insulated copper wire from his supply on his tool bench. At first, the wire he cut was too thick for the bells to slide onto, but once the insulation was stripped off, it was perfect.

Elly helped me load the 60+ bells onto the wire.

At the top, I just twisted the wires together and curved one end to form a hook. Easy.

The queen of crafts has a full tutorial here on how to make a similar one though I think hers is smaller, but you could just make it bigger by cutting a longer strand of wire and using a paint can rather than a soup can.

The color on most of the bells are faded, but that is because I bought them used on eBay for a dollar plus shipping. Gotta love eBay. Besides, I like the dull finish. It offers the wreath a little color without overpowering the yarn wreath.

Wreath Making

Last year, I bought a basket full of red glass ornaments. They had called out to me. When I got them home, I stared at them for a while, but no bright ideas came to me. So, up in the attic they went. When pulling all the Christmas decorations out, I spotted the ornaments. I knew exactly what I wanted to make with them.

Instead my wreath looks like this.

Go ahead. Say it. It’s a hot mess. Either it needs more ornaments or it needs to be thrown in the trash. I haven’t decided which.

Unwilling to give up on a wreath idea completely, I pulled out the yarn strands and came up with this.

The bells were crocheted by my MIL a few years ago. She made them to be ornaments, but I don’t think she’ll mind.

Elly was excited over the wreath too and asked to be the one to hang it up.

Strands of Yarn

A few months ago at a yard sale, I bought 4 bags of yarn.

On the way home, I thought of all the projects I could use the little odd balls of yarn in, starting with another skirt for Elly.

As is often my habit, I took my loot over to my neighbor’s house to show her my good fortune. As I pulled it out of the bags, my heart sunk. Something was dreadfully wrong.

These bags weren’t filled with little balls of yarn. The yarn had been meticulously cut into strands measuring a yard long. It must have taken hours to cut it up. Why would anybody do such a thing? More importantly, what was I going to do with a bunch of yarn strands?

My neighbor was equally bewildered. Yet, she said there was nothing to be done for it. If I wanted to use the yarn, I would have to tie it back together. Unfortunately, anything I knit with the yarn would have a thousand knots in it.

She was right, but I didn’t love the idea. So, I did nothing for a month with the hope that I would come up with a better plan.

Watching Elly play with the fabric boa I made her for last Christmas gave me the inspiration I needed.

I had used this tutorial to make it. It was lovely because it required no sewing. I just tied strips of fabric to a foundation strip of fabric measuring the length of the boa.

Now what little girl doesn’t need a drawer full of boas? Hopefully, I’ll finish this one in time for Christmas as well.

The funny thing is the yarn strands have to be cut even shorter. It works best when they are about a foot long. Since some of the yarn is slippery, I double knot them onto the foundation yarn, which is nothing but 4 strips of thick t-shirt yarn measuring 60 inches in length. Elly loves using scissors so she is our big helper.

Preserving Elly’s Artwork

It’s already started and Elly isn’t even in school yet. There is already a massive amount of artwork pouring out of her. Thankfully, her favorite medium is currently modeling clay and the easiest way to preserve such masterpieces is to just take a picture.

Not so with the masterpieces that are made with paint and crayons. Rather, I don’t have the heart to throw out her artwork. To combat the growing stack and to share the love, I already mail stacks of her artwork to relatives. Elly’s grandmother, great grandmother, grandfather, great aunt and dear neighbor have a collection of her artwork. Still I hadn’t quite figured out what to do with all the artwork I was keeping.

While working on the 3rd scrapbook for our family, I realized half was just Elly’s artwork. It made more sense to make a scrapbook just for her artwork. So, that is exactly what I did.

Here are my supplies spread out on my new craft table, another yard sale find. I might be becoming an addict.

I tried to keep the pages as simple as possible so that the feature was Elly’s artwork. The scrapbook can be expanded, which is a good thing.


One piece of artwork wasn’t put in the scrapbook because I just love it. If I saw it in an art gallery, I would buy it. It’s amazing.

Just look at the bright red color, the circular motion and the use of white to balance it all out. It’s good. Artists could learn something from my Elly. So, I decided to frame it instead.

In Search of a Marriage Poem

For the past two years I have given calligraphy as a Christmas gift.

I started the practice because I couldn’t find a way to preserve the Home Blessing that Dan’s grandmother held so dear. She had saved the blessing for years, but the paper that it was written on had seen better days. Unable to find the blessing for sale anywhere, I took matters into my own hands. (Darn if I can find a picture of it though).

I had taught myself how to do calligraphy years ago so that I could address our wedding invitations. Surprisingly, my hand remembered how to make many lowercase letters in the Old English alphabet. The uppercase letters required more practice.

This past Christmas, I transcribed an excerpt of Billy Collin’s Question About Angels poem for my aunt who loves angels.

She told me recently how much she enjoys the poem and how much she appreciated all the work I put into it.

I didn’t need the praise. I truly enjoy doing calligraphy.

With 3 (yes 3) weddings coming up this year, I wanted to find a poem about marriage that I could transcribe for the happy couples. I searched through my favorite poetry books and came up empty.

Most of the poems about love that I found were from a man’s perspective written to a woman. I want the poem to be for both the bride and the groom.

There is the traditional “Love is kind and etc” but I was hoping for something a bit more modern, unique and fun. Any ideas?

Maybe I should look to a novel and pull an excerpt out. Unfortunately, I’m drawing a blank. I don’t often never read romance books.  Can you recommended any good books where marriage is a theme (and a good one)?

A Prettier Ornament

This time we used homemade play dough to make a Christmas ornament.

It was remarkably simple. I rolled out the dough with an old rolling pin. Elly pressed a star cookie cutter into the dough. We both pulled away the excess dough. The ornament was then left to dry for a week. Before hanging it on the tree, I coated it with a spray acrylic gloss. I read somewhere that the gloss would help preserve it.

While it was still wet, I scratched in the words “Elly” and “2011” with a toothpick. Unfortunately, it is hard to read them now.