Making Cards with Elly

The foam sponges from Alex Toys are Elly’s favorite way to paint right now.

I had purchased these sponges a few months ago, but for a while Elly wasn’t in a mood to paint or draw. She seems to go in stages. Right now, we are in a painting stage. We’ve painted every day this week.

Earlier this week, Elly sponge painted on construction paper. My favorite piece is hanging in her bedroom.

Yesterday, I pulled some blank cards out and let Elly sponge paint them.

The design comes out so nice because of the way Elly prefers to apply the paint to the sponge. Originally, I had taught her to just press the sponge into the bowl of washable paint we use.

(Oh yes, we use washable paint by Crayola. Despite wearing an apron, the paint gets everywhere. It is partly because Elly likes to paint herself when she tires of painting on paper.)

Yet, Elly would often get frustrated with how difficult it was to get paint over the entire sponge. She wanted the end result to look like a dinosaur or a cat. So, I taught her how to apply the paint to the sponge with a paintbrush. She’ll paint one sponge after another. The joy seems to be in the painting and not in the stamping.

Advertisement

Scrapbook made by a Lazy Person

I love scrapbooking but, I’m lazy. I don’t use fancy paper, pretty stickers or even photos. My scrapbooks are filled with little pieces of paper that would otherwise be stuffed in a drawer or thrown in the trash.


It’s the same way my Grandmother made a scrapbook when she was a young woman. Her simple scrapbook is a family treasure now. Maybe one day the scrapbooks I made will be treasured by the younger generation.

At least, they will get a kick out of how we pay for things. (My grandmother had movie tickets costing a quarter!).

The only drawback to making a scrapbook the lazy way is that it has become increasingly hard to find an old-fashioned scrapbook filled with heavy, white, blank paper.The craft stores only sell the kind that has a handful of top-loading sheet protectors.

Planning a Party

Elly will be 1 year old next month! Our little girl is growing up.

To celebrate, we are planning the 1st of many birthday parties.

Despite my attempt to divide and conquer our families separately, we’ll be inviting everyone at once. I’m nervous about hosting such a large get-together. Our biggest party to date had only 8 guests. Even if people decline, we’re looking at four times that many people.

1) I don’t know how we’ll fit that many people in our small home.
2) I don’t have a clue what food to serve outside of cake and ice cream.
3) Do I have to decorate?

No doubt about it though, Elly is worth all the hub-bub.

Card Overflow

My card system is starting to implode from my recent and not so recent card-making marathons.

The collection of cards for this year’s and next year’s birthdays no longer fits into 1 organizer. Recently, I had to buy a 2nd one.

The card drawer is nearing its capacity limit.

Don’t be deceived by the cleanliness. Most of the cards are just stacked on top of each other. To find just the right card, I have to dig through the entire stack. For example, in the far right corner is a stack of cards: Baby Shower Thank You cards on top of Christmas cards on top of Baby Announcement cards.

In an attempt to organize, I converted an old photo box into a card organizer. It too is full.

My recent subscription to the Card Maker magazine is NOT helping matters.

So, I have made the decision to place some of my cards in my Etsy shop in the hopes of removing some of the clutter. 

This will of course make room for more cards.

If anybody has any better ideas, I am all ears. I’ve never had so many cards stockpiled and am puzzled as to how to store them until it’s time to mail them out.

This is a post from Knitted Gem’s blog, authored by Marie Haigh.

Card Frenzy to Hide the Shawl

I finished all 50 of the birth announcement cards (to be sent out in January after Elly is born).

They are addressed and signed. All that needs to be added are stamps, the baby’s stats and a picture. A dear friend of mine had a great idea on how to include the stats: print them out 4 to a page and slide one into each card. It sounds so much easier than my original plan of hand-writing the info into each card.

Because I couldn’t stop there, I made more cards.

And then more cards

Until finally last night, I packed up all my card supplies and stashed them away. I think my favorite layout of the entire weekend can be seen in these 2 cards.

Now that I overwhelmed you with pictures of cards, perhaps you won’t bother to notice that the shawl doesn’t look any larger than the picture I took of it over a week ago.

That’s what happens when you rip out the entire last section. It was worth it though. The lace pattern had only shifted over two stitches, but it bothered me. This shawl is supposed to be an heirloom for Elizabeth – something she can wear on her wedding day. (Maybe I should have knit it in white.) I knew I wouldn’t be happy with her wearing a shawl that had an obvious-error-to-me in it. So, out it came.

This time not only did it knit up much faster, the lace pattern has no errors. What a relief.

This is a post from Knitted Gem’s blog, authored by Marie Haigh.

Weekend of Cards, Knits and a Wedding

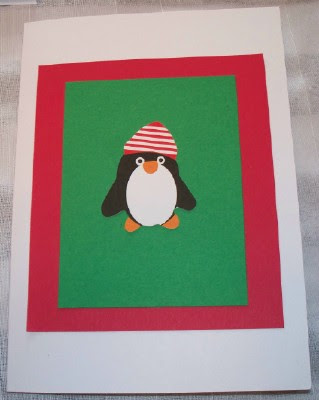
My weekend started off with a crazy plan to make all 50+ of the birth announcements we will send out after the happy occasion. (Yes, I know that the event is still 5 months away, but I’m ever so slightly concerned about my energy level plummeting in another month or so. Best to take the bull by the horns whilst I still have the gumption).

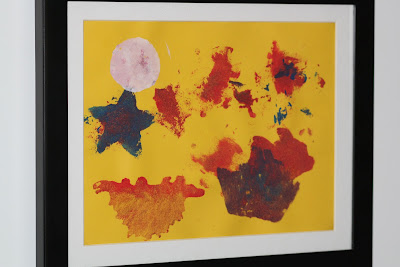
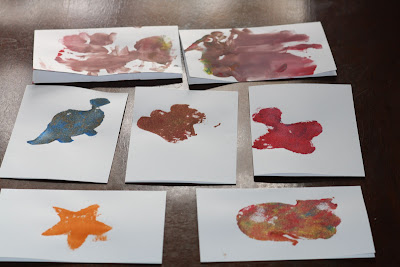
I had picked up a packet of stencils from my favorite consignment store in town, Memories & More. From it I was able to make several different cards.

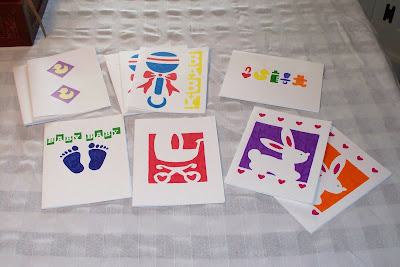
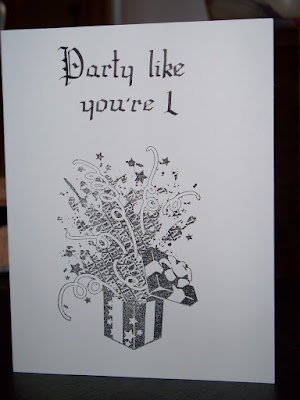
I made another batch of cards by cutting up some wrapping paper and pairing it with other simple supplies I had in my card drawer.

My favorite card from the entire day of card making was a baseball-themed card I made. The glove is from a button that I cut the back off of.

21 cards later, I finally packed up my supplies and took a well-earned break.

A well-earned break in my mind typically involves knitting of some sort. In this case, I completed 1 section of the Reverse Baseball Blanket. The right “eye” is done.

As a reward, I allowed myself to cast on for a new project. Due to my insomnia (this baby wakes me up nightly to eat and he’s not even born yet!), I finished the project in 1 day.
[Let me reiterate that we do not know the sex of the baby yet. It just seems more personal to refer to the baby as ‘he’ rather than ‘it’. Besides, Tamsie did mention to me that she had a feeling the baby was a boy. On Friday, we’ll find out for sure whether we’re having a boy or a girl, assuming the baby cooperates.]

Details
Pattern: Baseball Bat Dishcloth (Ravelry link)
Designer: Emily Jagos
Yarn: Lily’s Cream and Sugar in Red
Needle: Size 6
Alterations: Changed the border to Garter Stitch from the seed stitch. To ensure that the width of the border matched the height, I added 2 rows to the top and bottom borders.
On the bind-off row, I used EZ’s trick for a cleaner edge and purled all stitches.

In general, this was a fun and easy knit. The design is perfect for the nursery theme.

To top the weekend off right, Dan and I attended a wedding reception. The couple’s theme was Las Vegas, since that was where they tied the knot (and the reason for Dan’s absence during the brutal storm last week … see previous post).

The main course of the reception was a huge pig roast. Delicious!

Since the reception was held at Snipes in Morrisville, we decided to swing by the house where Dan’s mother and step-father used to live before they moved to Maine. During the drive through town, I complemented Dan on his good sense of direction for even after 8 years of absense, he knew exactly where to go. If it had been up to me, we would still be driving through the streets of Morrisville.

We were both shocked by the house’s appearance. It was red!

It used to be white.

Back from a Long Rest

I’m still here!

I apologize for my long absence. I have been busy and will explain why soon.

Of course, I never stopped knitting. I’m pleased to report that the 2nd slipper is finished!

Stats
Pattern: Grown-up Booties
Designer: Ysolda Teague
Yarn: unknown wool – just some leftover yarn in my stash
Made for: Me. I love to wear slippers around the house. Sometimes I even wear them when visiting my neighbor across the street.

They are warm and comfy. Too warm. I’ve relegated them to my cedar closet until Fall arrives.

Tomorrow is the baby shower for the twins. I can’t wait to give the two BSJs I knit to the proud Mom-to-be. Here’s hoping she likes them.

Though I had a card all picked out, I couldn’t resist making more ‘baby’ cards for the occassion.

Not able to stop there, I made just a few more cards. Some are photo cards. Some are fabric cards for the 4th of July. The flower card and the bird card are made from used/recycled papers.

I just love cards!

Have a wonderful weekend.

Free. Works.

On Thursday afternoon, I was driving back from Midas with Jake (since he makes the walk down to Midas much more pleasant than going alone) when I saw a young couple place a cabinet on the sidewalk in front of their house. Hopeful that the cabinet was what I thought it was, I rushed Jake into the house. I don’t think I even wasted the few seconds it would have taken to lock the door.

I was right.

It was a sewing machine.

I folded it up nice and neat in its cabinet, stuffed the foot pedal in my jacket pocket and lugged it back home.

It is a Sears Kenmore model 158.14100, probably built in the 70’s. It is all metal, which I surmised during my walk back home with it. It was heavy!

It took me over an hour to take it all apart and clean the grime, dust, dirt and massive amounts of lint out of it. It has the occasional nick and scratch on it. Plus, it’s missing all of the spare parts (extra feet, extra bobbins, etc). Otherwise, it appears to be in great shape. I threaded the machine this morning and gave it a test drive. Either I have one of the dials set incorrectly, which is very likely since I’m not sure what they all mean, or the stitch length mechanism needs to be tuned by a professional. I’ve ordered the manual just in case it’s a user-error. Hopefully, it will arrive soon. My goal is to make this ole girl my full-time quilting machine. Right now if I want to do any quilting, I have to rethread my 10-year-old Sears Kenmore machine, (funny coincidence, isn’t it?), shuffle my work area around, and put my current sewing projects on hold.

When I wasn’t fiddling with my new toy this weekend, I made a few more cards from a kid-sized puzzle.

Card Binge

With St. Patrick’s Day and Easter fast approaching and no appropriate cards in my stash, I went on a card-making frenzy this past weekend.

26 cards!
I had the materials to make twice as many, but I started to feel like I was on an assembly line. Unlike Lucy’s episode, there was no chocolate on hand. Perhaps I would have stayed the course if there had been. Next time, I’ll plan better.

The heart cards were made from cake-sized paper plates.

The St. Patrick Day cards were made from a Mardi-gras-style necklace, a lei-style necklace, old cards, and a shamrock cookie cutter. I had so much fun making these.

These 4 Easter cards were made from paper napkins, ribbon, cardstock (the basket) and twine (the basket handle). I found the paper napkins much easier to work with than cotton fabric.

The animal and flower Easter cards (or Spring cards) were made from the same paper napkins used above, cookie cutters, card stock and ribbon.

Some people sell the cards they make. I don’t think I could ever make enough of a surplus to do that. I enjoy sending cards via snail mail too much. The entire stack of St. Patrick’s Day cards was posted in this morning’s mail after forcing Dan to sign them while he was eating his breakfast.

Christmas Card Factory

Every January, I put up all the Christmas cards received from friends and family along with all the decorations. Last year, I also purchased the lion’s share of the Christmas cards I would need in December, so I wouldn’t have to do any running around in November. I had planned to do the same thing again this January.

All that changed when I was inspired by Mette’s tutorial on how to make your own Christmas cards from tea bags.

Well, I didn’t have any tea bags sitting around, since I only drink loose tea these days, but I did have a stack of Holiday cards.

It was so much fun that I got a little carried away and ended up making 42 cards. Not all of them were made from old Holiday cards.

These two were made from an old LP cover. For nothing says Merry Christmas like two Vikings dancing a polka in front of a pine tree, right?

This one is actually an old hot pad cover. I just peeled off the image from the pressed cardboard and adhered it to a blank card.

This cute guy I did steal off of one of the cards we got over the holidays.

Yet, the vast majority were made by cutting tree images out of the cards we received. First, I made a tree template from cardboard, specifically a box from the breakfast bars we eat occasionally. Then, using a quilter’s applique trick, I fussy-cut the images I wanted from the cards. Finally, I either glued them directly onto the cards or glued them onto a small piece of cardstock.