Spinning for Sanity’s Sake

Elly is still quite comfy despite the ever-shrinking walls around her. If this extended stay is taking a toll on anybody, it’s me. I have gone through the whole spectrum of emotions:

frustration over still being pregnant (41 weeks and 1 day)
excitement over the false labor contractions getting stronger disappointment over the false labor never progressing into true labor
joy at still being able to take my daily walks with Jake
anger over the assumption that surely by now I’ve gone into labor
gratefulness to my husband for being my rock
sadness over the fact that we are still without our Elly
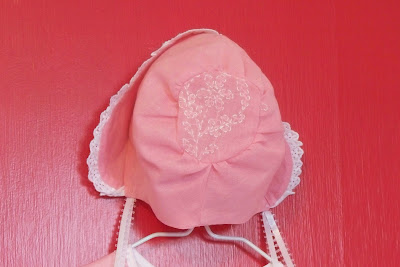
happiness at finishing the final project for E: embroidered quilt label

Since I have finished all my current projects for Elly (excluding the knitting projects that I can’t work on because I’m too hot just sitting around the house in a t-shirt), I decided to start a project just for me.

Spinning.
I had stayed away from it as I was certain that it would cause the same overheating problem that knitting did. Yet, with spinning, there is no huge blanket or shawl sitting on my lap allowing me to spin to my heart’s content.

It had been so long. I had forgotten how much I loved to spin on my Jenkins Turkish spindle.

Currently, I am finishing up a project I started months ago: brown Shetland wool blended 50/50 with silver hair from an alpaca named Buddy.

This is a post from Knitted Gem’s blog, authored by Marie Haigh.

Still Waiting

Elizabeth’s due date came and went on Monday. Here it is Wednesday and Miss E still doesn’t want to come out and play yet.

The finishing of her quilt on Monday did nothing to entice her. It seems that she is quite cozy where she is, thank you very much.

The front:

The back:

Stats:
Design: My own, if you can call it a design. Truly it’s nothing more than a huge 9-patch square enclosed by 2 borders.
Quilting: I used a combination of stitch-in-the-ditch, following lines in the themed fabric, and using cookie cutters to draw designs in the plain fabric squares.
Fabric: The princess squares and the back fabric are from a line called “Once Upon a Time”. I found it in my local quilting store (how spoiled I am to have both a quilting store and a sewing store within walking distance). Additionally the red heart fabric was also found in my local quilting store. The blue fabric was “donated” by Dan; it’s an old work shirt of his that no longer fit. The white fabric was from an old sheet. I just love to incorporate at least one “old” fabric in each of my quilts.
Duration: 1 week from start to finish; I think it’s the fastest I’ve ever completed a quilt. I should bottle this nesting instinct and sell it. I could make a fortune!

More Pretties for Elly

Pressured by the fact that my sewing machines will have to packed away for a month and extremely motivated by the nesting instinct, I have been sewing up a storm for Elly.

I recently completed bloomers for Elly


Stats
Pattern:
Tessa Bloomers
Designer: Marie-Madeline Studio
Size: 2T – it was the smallest size the pattern came in
Alterations: None that you can see. Since I’m a stickler about seams especially when it comes to children’s clothes, I ignored the pattern’s suggestion to use a serger (mainly because I don’t own a serger) or a zigzag stitch. Instead I used a mock French seam in most areas and double bias tape where the bloomers are gathered.  
Review: Great pattern and cute design!

along with a kimono robe and bonnet to match the pink dress made earlier


Stats:
Pattern: Simplicity 2900, a vintage pattern from 1952
Size: Small, 6 months
Alterations: Mainly I ignored their suggestion on where and how to place the embroidery. The fabric I used was already embroidered so all I had to do was cut the pattern pieces out carefully. Additionally, the lace on the kimono robe hides the fact that I had to piece together the front of the robe in order to get the embroidery on the bottom.


Review: As thrilled as I am with how the dress, kimono robe and bonnet look together, this pattern required too much hand sewing to get an A+ from me.
Note: I have already informed Dan that we will have to take Elly someplace special so she can wear her pretty dress and accessories even if all we do is drive over to her Granny’s house.

and finally a pillow to preserve the cross stitch my MIL made for Dan many years ago.


Stats:
None. This was simply a matter of adding sashing around the cross stitch and a plain piece of fabric to the back.

Next up, I’m thinking of starting a daybed cover for the guest bedroom unless I change my mind and sew something else for Elly. It does seem slightly silly to make a daybed cover when the daybed is going to be used almost daily for a month after Elly is born. Which is to say that the cover is going to spend most of its time folded away in the linen closet whilst the bed is in use.

So, should I sew a Mei Tai sling (noting that I already own the Ergo sling), a robe for Elly, a play outfit for Elly, or curtains for the guest bedroom?

Or should I just pack away my last remaining sewing machine and focus on my knitting projects? I have yet to complete Elly’s baseball blanket or her heirloom shawl.

Decisions. Decisions.

This is a post from Knitted Gem’s blog, authored by Marie Haigh.

Sewing Tutorial – Nursing Cover

As promised, I put together a short tutorial on how to make your very own nursing cover, a.k.a. hooter hider.

It’s a fast and easy project that should take no more than 1 afternoon to complete. Make one for yourself or make one for a baby shower gift. Heck, make two.

Materials required:
1 yard of main fabric in 100% cotton
1 yard of coordinating lining fabric in 100% cotton
2 two-inch-wide D-rings
thread to match fabric

Cutting specifications:
Cut 1 rectangle each from main fabric and lining fabric for the body:
33″ wide by 31″ long

Cut 2 strips from the lining fabric for the 1st strap:
3″ wide by 30″ long

Cut 2 strips from the lining fabric for the 2nd strap:
3″ wide by 13″ long

Seam allowance:
Unless otherwise noted, the seam allowance is 1/2″.

Instructions:
First, with right sides together sew around the edges of the 1st strap, leaving one short end open. Trim corners. Turn right side out. Press. Top stitch 1/4″ from edge around sewn edges.

Next, with right sides together sew the along the long edges of the 2nd strap, leaving both short ends open. Turn right side out. Press. Top stitch 1/4″ along sewn edges. Then, slide on the D-rings. Fold strap in half with the D-rings at one end and raw edges at the other. Stitch 3/4″ underneath the D-rings securing them in place.

Pin right sides of the body together. Then, insert straps into the top of the body 9.5″ from sides. Match up the raw edges of the straps with the raw edges of the body. Make sure the finished edges of the straps are tucked safely into the center of the body, away from where the stitching will occur.

Stitch body together, leaving a 5-inch opening at the bottom to turn right side out. Back-stitch over straps. Trim corners.

Turn body right side out. Press. Top stitch 1/4″ all around the body.

This is a post from Knitted Gem’s blog, authored by Marie Haigh.

Sewing Frantically because Elly will be Here Soon

The curtains are finished!

Baseball buttons adorn both panels now allowing me to fold up the bottom half to make room for the radiator.

While waiting for the buttons to arrive, I whipped up a nursing cover, a.k.a. hooter hider.

Since it was such a joy to sew, I’ll be posting a short tutorial on the cover in a few days.

Currently, I am sewing up Elly and her little friend in Seattle matching bloomers. If I finish them as quickly as I would like to, I plan to sew one more item for Elly: a bathrobe. Then, there is also the Mei Tai sling I’d love to find time to sew.

But the clock is a-ticking. Elizabeth is considered full-term now at 37 weeks.

With a little luck, she will enjoy hanging out in her current abode for a few more weeks, giving her Mom time to finish all the current sewing and knitting projects and time to reorganize the guest bedroom/sewing room. It pains me already to think that I will have to pack away my sewing machines for over a month to accomodate our overnight guests. Yet, the help I will receive in return should more than make up for it. Besides, will I really have time to sew when Elly is a newborn? I suppose not. And, of course, I’ll still have my knitting.

This is a post from Knitted Gem’s blog, authored by Marie Haigh.

The 9 Cent Tour

We’re still not quite ready to give the 10-cent tour. There are a few more paintings and decorations to hang. Yet, the lion’s share is done.

Dan ticked off the big items on his Honey-Do list: assemble dressar, assemble crib, hang plate collection and move bookcase.

The penants were a gift from my baby shower. On each one is a message from a friend or family member conveying their congrats, well wishes or advice.

The funniest advice: “Drink heavily”
The sweetest advice: “Love each other”
The best advice: “Do whatever you want” for Elly will be just fine.

The last item remaining on my to-do list were the curtains and as you’ll see in the pictures, they are 99% finished (I’m awaiting buttons to arrive via mail so I can fold them up over the radiator).

Not to boast, but I am soooo happy with how Elizabeth’s room looks.

This post was added to TDC’s Kid’s Rooms link up.

Thrifty Decor Chick

Utensil Case Tutorial for an Easy Gift

My first sewing tutorial was supposed to be Radiator-Friendly curtains, but I got side-tracked. Christmas is right around the corner and I needed to finish the handmade presents I had planned to make months ago. Why I always wait until 2 weeks before the deadline is beyond me.

Just in case you’re scrambling for a quick and easy handmade gift too, I decided to share my instructions on how to make the utensil case shown below. I made this case in one afternoon. Its design is based off of my favorite dp knitting needle case.

Cut 1 rectangle each from main fabric and lining fabric:
Rectangle dimensions: 11 1/4 inches wide by 14 1/4 inches long

Cut 1 rectangle from lining:
Rectangle dimensions: 11 1/4 inches wide by 5 1/8 inches long

On shorter piece of lining, fold top down 1/2 inch. Press. Then fold raw edge into crease. Press. Topstitch close to fold.

With the wrong side of the short piece of lining facing the right side of the longer piece of lining, match up the raw edges on the bottom edge and sides. Stay-stitch using a 3/8 inch seam allowance.

Next, stitch 5 separation seams 1 5/8 inches apart only where the two linings are stacked on top of each other. The first and last separation seam will be 1 5/8 inches plus 5/8 inch away from the edges or 2 1/4 inches from the edges to accomodate for the seam allowance. Hint: mark first with fabric pencil, then stitch.

Cut two (2) 16-inch lengths from a coordinating ribbon. Line up raw edges of ribbon with raw edges of lining, centering it over the top edge of the utensil slots. Stay-stitch the ribbon in place using a 3/8 inch seam allowance.

With right sides together, stitch main fabric to lining using a 5/8 inch seam allowance. Be sure to leave a gap at the top to turn and to tuck the ribbon inside. Trim corners. Turn right side out. Press. Slip stitch opening closed.

Fold raw edges of ribbon twice over and hand tack down with a running stitch.

Insert utensils. Note: If you didn’t have the forethought to purchase the bamboo utensils in advance (they can be found on Amazon), you can always raid your kitchen drawer for a set of utensils.

Fold in half and tie with ribbon.

Of course if you’re really pressed for time (and you still have a week before Christmas or whichever holiday/event you’re celebrating), you can buy the utensils and handmade case from Ponyup on Etsy. Note that her case design is a bit different from mine.

This is a post from Knitted Gem’s blog, authored by Marie Haigh.

Nancy’s Gift and More

Dan finished working on the hardwood floor, so I can finally show you the amazing gift Elizabeth received from Nancy.

An embroidered pillow!

Isn’t is beautiful? I just love how the little girl has red hair and how the little boy has blond hair. Once upon a time, Dan had blond hair too. Now, he’s going for the distinguished look with his salt and pepper hair.

The pillow looks perfect on the rocking chair we plan to use in Elizabeth’s room.

You can read about Nancy’s process in making this pillow on her blog here.

Pardon the tag left on the rug, I’m still deciding if we want to keep this rug or buy a much larger area rug. Dan is done deciding; he loves the new rug. Yet, I think it’s impractical. Obviously, Elly will need a larger area to crawl around on.

The curtains are working out much better. I’m pleased as punch with how the 1st panel came out.

Usually, I list the stats on the pattern, but there are none for this curtain. I designed these curtains myself because I was unwilling to compromise on the length of them. You see, I love curtains that hang all the way to the floor. They have a sense of elegance and homeyness to them. Just my luck, we live in a house where I can’t have curtains that hang to the floor, since every window except 3 have radiators underneath them.

I can be stubborn when I want to be though. Elizabeth was going to have full-length curtains in her room so help me.

This design was my compromise: full-length curtains that can be folded up and buttoned when they needed to be closed over the radiators.

Since I still have the other panel to sew up, I will attempt to write-up a tutorial should anybody else have my desire/determination to hang full-length curtains on windows that sit overtop a radiator.

This is a post from Knitted Gem’s blog, authored by Marie Haigh.