Musical Chairs with a Wood Stove

My best friend is gifting us her wood stove. It’s been sitting in her house for years and she’s never used (came with the house). She is only too happy to get rid of it.

We’ve been talking about getting a wood stove or an insert for our fireplace for years to make it more insulated and to give off better heat.

The gift sounds perfect until you remember that we live in a small house. A wood stove is going to take up precious real estate in the living room/entryway.

Dan wants to solve the problem by moving the TV to the entryway and turning the couch so the back of it faces the fireplace. This is why Dan is not allowed to make decorating decisions by himself.

My idea involves moving every piece of furniture we own in the living and dining rooms, removing the existing chair rail, installing a new chair rail and wainscoting in the living room, installing crown molding in the living room and buying more cube storage for all of Elly’s toys.

Dan’s idea could be completed in 5 minutes. Mine will take months to finish. Still, my idea is better.

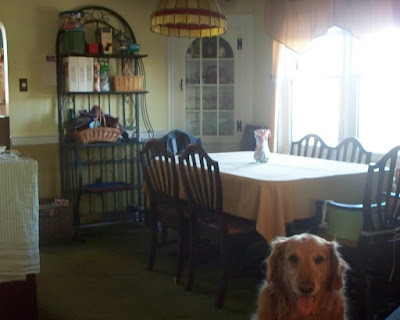
This is what our current dining room looks like.

In my plan, the dining table, chairs and hutch would be moved out. The garish chandelier would be tossed in the trash and replaced with a fan and light combo. The ugly green carpet would be thrown in the trash. The chair rail would be removed. The walls would be painted all one color – maybe a deep brown to cozy the space up. On the wall where the hutch is now, I will put the TV and entertainment center. Where the table is now, I will place the couch. Then, finally, the very first thing that you see upon entering our house will NOT be the TV.


current view upon walking into our house

Oh, happy days! The image in my mind alone has me jumping for joy!

Then, the dining table, chairs and hutch will have to go in the living room.
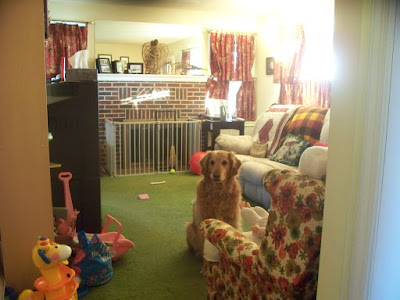

the living room

I can’t just get rid of it. Our kitchen is small and has no eat-in nook. Thus, we use our dining table every day – sometimes twice a day.

I’m hoping that the addition of a chair rail, beadboard wainscoting and crown molding will help define part of the living room as a semi formal dining spot. An area rug will be used to anchor the table. Obviously, the ghastly green carpet will be thrown in the trash first.

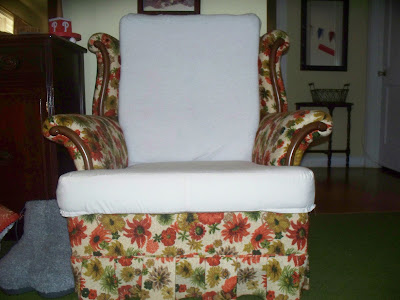
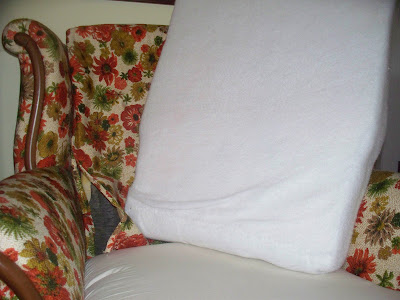
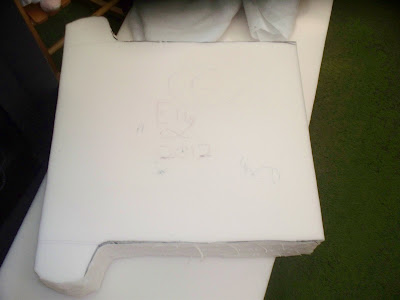
The wing back chair that I am slowly sewing a slip cover for will be placed to the right of the fireplace. I would love to thrift a second wing back chair and place it to the left of the fireplace, but Dan wants room left for his computer desk. Oh, the compromises I make to keep a happy marriage.

So what do you think of my crazy and amazing plan? Would it be weird to walk into someone’s house and immediately see their dining table?

Of course, the real question is do we want a wood stove now. Dan is terrified that Elly would suffer burns. Having fallen asleep in the sun and gotten 3rd degree burn, I can attest that burns are not fun. I would feel like the world’s worst mother if she got burnt by my crazy redecorating plans.

Replacing an Attached Cushion

Spurred on by my success of replacing the old seat cushion, I announced to Dan that I was going to replace all the cushions on the wingback chair. Dan thought the only way I could accomplish such a task was to reupholster the chair. I knew I didn’t want to do that. So, I set out to prove him wrong.

I won.

A quick search on the internet found instructions on eHow.

Perhaps reupholstering the chair would have been easier, but if I staple the new fabric on I can kiss goodbye the ability of ever washing it. Light colored fabric coupled with a small child makes washing a necessity.

The hard part will come when I try to shove the new cushion back into the attached fabric of the chair, but I’m a determined gal.

An eagle eye will notice that the muslim cover to the seat cushion has an error. Read more about it here.

A New Chair Cushion

In addition to repainting all the kitchen cabinets a lovely shade of turquoie, I have started to sew a slip cover for this chair.

It came with the house. I didn’t pick that fabric out.

When removing the current cover on the seat cushion, I noticed the horrible yellow staining and massive deterioration. Thus, the first step was to make a new seat cushion.

Of course, Elly helped.

First, I cut out a new cushion from the giant roll of foam I ordered from Joann. (I used a coupon to cut the price way down). Next, we decorated the foam with markers.

Afterwards, I wrapped the foam in two layers of low loft batting and then whip stitched it closed.

The difference is amazing. This might be the most comfortable chair in our house now.

Degreasing Cabinets

Palmolive, hot water, a scouring pad and a little bit of elbow grease were all I needed to remove years of grease and grime.

If you want to preserve the current paint or finish, then I wouldn’t recommend using the same technique. The scouring pad removed a layer of paint with the unwanted grime, but that just saves me time and effort. I can now skip the sanding step and jump straight to the priming step.

The only challenge lies in how to keep Elly occupied with her washable paints while I paint over all the avocado green. Wish me luck.

Shooting for the Moon

When I had first painted Elly’s room, I had only stenciled her growth chart up to 3 feet. I was so sure that it would be at least 3 years before I would have to extend it.

Elly isn’t even 2 yet and yesterday I had to pull out the stencils and paint.

Dan promised me that this would be the last time.

A Turquoise Makeover

I love my kitchen.

True, it is stuck in the 1960’s but I think the outdated decor gives it charm. Besides the stove is to die for with extra space in between the burners and two ovens.

I have received lovely comments about the avocado green cabinets. I have tried to live with the color these past 6 years. I have even tried to embrace it by making a matching fan cover

(see it above the stove?) and lining the shelves in green.

Yet, the color just feels drab to me.

So, yesterday I decided to see what different colors would look like on the cabinets by painting small sections with acrylic paint. First, I tried red. It was nice. Then, I tried my favorite color turquoise.

I just stood there grinning from ear to ear. It made me so happy. This was the color for me!

Can you see it?

Unfortunately, some prep work has to be done before I can paint the cabinets. There are years worth of grease coating the cabinets that must be scrubbed off first. I’m hoping Dawn will make mean work of it.